Sunday, September 30, 2012

Screen Porch Remodel - Day 5 (It's the little things)

It doesn't look like a lot of change in the pictures, but there was a good bit of work done before and during day five. Here is the breakdown of the work completed before day five.
  • Taping completed on the windows and door
  • Door painted to match the siding
  • Door hardware installation started (one strikeplate needs replaced and everything needs locktight)
Day five brought out our worker Jons in addition to a bonus worker grandpa who stopped by to add color commentary. They cut, fit, and attached all the J channel around the windows and doors. They also planned out the siding attachment strategy with a box for a future outdoor light fixture and trying to make the siding as seamless as possible with the existing house. It will be interesting to see how it all comes out on the next work day. Here are some pictures of the day.

 J channel application in process.

 Before the J channel...

 My Jon gives the other Jon an "adjustment".

 Precision cutting and fitting.

 Painted door with hardware.

 Completed day five work (can you even see the J channel?)

More practically invisible J channel and a lovely corner piece to clean up that messy Tyvek.

Day five is in the can and hopefully the next work day brings some siding into the picture. We need to get this house buttoned up before we get our first snow...usually in October. I kid you not.

Saturday, September 29, 2012

A little monster for October

I was inspired by this monster wreath tutorial over on Baby Rabies and had to try it out. I've been pinning wreaths to make for my front door and this is the first one I've actually completed. I made some adjustments in making the wreath. I shied away from using a hot glue gun because I didn't feel like digging it out and plugging it in. I just used small straight pins to pin the black ribbon down over the wreath (14" straw wreath with the plastic still on), used pins to tack on the foam teeth, and pins to attach the bow-tie and hanging ribbon. Here is my finished product.


He's a bit fluffy and gets smooshed behind the storm door so I might trim him back a bit. For now, we love him.

Screen Porch Remodel - Day 4 (BIG DAY)

The windows and doors were installed on day four* which made this a pretty momentous day. Additionally fun, was that it was completed right as the rain started coming down. The work necessitated an additional worker and our neighbor was kind enough to step up and give us a hand.
 There are 3 workers in this picture. See if you can find them all.

 We have windows and doors!

 After the install my husband started taping up the outside to seal it up and he added some more Great Stuff which is indeed great stuff.
Starting to look like a room rather than a mess.

Stay tuned for Day 5 which will be coming soon as well.

*Also, note that these days are not consecutive. They are mostly occurring on Saturdays with a Sunday if the football game isn't a home game.

Wednesday, September 19, 2012

Screen Porch Remodel - Day 3

My worker Jons were back at it on day 3, but this day was shortened due to birthday party festivities that were planned for 4:00pm. At least this day they got to start on time. They completed all the framing, tacked on the Tyvek, filled in the little spaces with Great Stuff, bent all the flashing pieces that would be needed, and installed a couple as well. Here are the after work pictures with only one during action shot, which were all I got to take today because I was running around like crazy trying to get ready for my daughter's second birthday party.

 Love my worker Jons.

That Great Stuff really does expand.

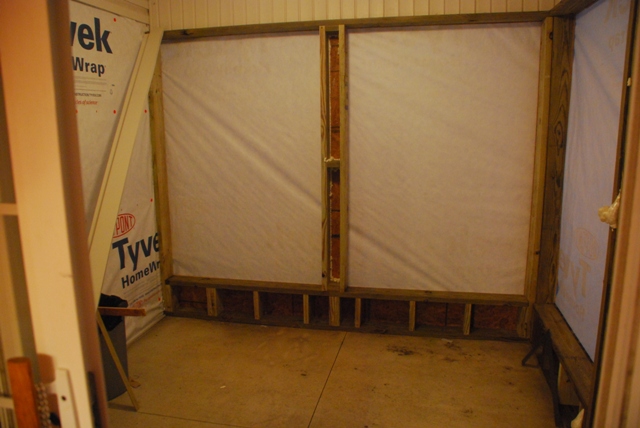
The view from the kitchen (we were expecting quite a bit of rain so they didn't cut the Tyvek over the openings).

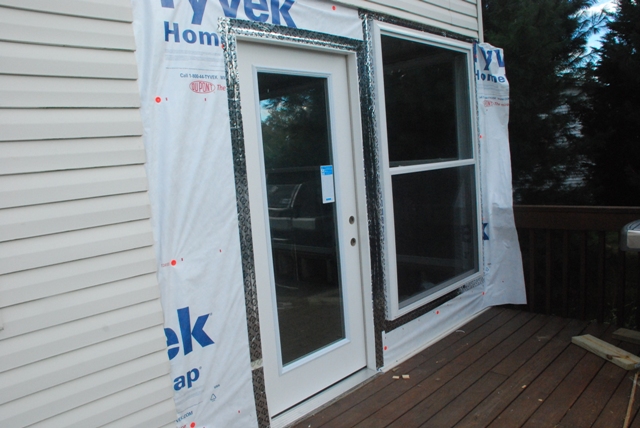
Future door placement. The slider to the kitchen is on my right.

I'm going to love this unimpeded corner view.

Lovely Tyvek. There is flashing installed along the edge where the deck meets the concrete pad to keep the moisture off the framing boards.

This side will receive its flashing on the next workday.

Next up will be window and door installation and it will really start to look like a room! It's going to get way more exciting soon. After that a day of siding installation and the interior decisions begin.

Forgot to mention in a previous post...when the worker Jons removed the siding on the solid interior wall they found a metal plate covering a vent opening. We're not sure if that is an outflow or inflow vent, but if it is an outflow vent we'll be able to have central air and heat in this room. No need to install the underfloor heating like we had originally planned. We also don't have to depend on the ceiling fan and hopefully getting some of the cooler air in the house to flow out there in the super hot months. That certainly makes our job quite a bit easier. We're planning a test for this weekend when the temperatures are supposed to dip into the 40's at night.

I do think we'll want to be able to close off that vent completely for the days we want to open up the porch/sunroom/breakfast nook*, but not the whole house for some reason.

*I'm at a loss for what to call this room once it is done. We just called it the porch for so long. Sunroom? Breakfast nook? 4 season room? Hmmm...

Sunday, September 16, 2012

Screen Porch Remodel - Day 2 More tearout with some framing

Day brought lots of work because they got a full Saturday to work. At least there would have been a full Saturday if the tool rental company hadn't rented out the tool that we told them we would be picking up that morning. Grrr...so that set the day back a bit finding another place to use for the rental. Some siding removal, Tyvek application, and framing happened. Here are the results with some during pictures too.

 My worker Jons.

 One side framed.

 Worker Jons goofing around.

 End of Day 2 accomplishments. One side framed and the other started.

It's going to be lovely.

Screen Porch Remodel - Day 1 Tearout

A Wednesday evening was spent tearing out the old screening and framing. Here are the results of that work. I only got shots from inside and never made it outside to get some shots from there. Just picture what it looked like before, but without the screen and white 2x4s and the ugly door. No more astroturf carpet and most of the wall siding had been removed.


Saturday, September 15, 2012

Best laid plans of mice and men often go astray

Plans that have been in the making since we first purchased our house in 2009, that is. We have a cute little screen porch next to the eat-in kitchen that sits directly under our younger daughter's bedroom. We never used it. Ever. Plus, the baby's room was actually several degrees different in temperature from all the other rooms in the house due to the floor being somewhat exposed by the screen porch.

So, the plan was to close it in and make it a 3 or 4 season room. Three years later those plans are actually about to come to fruition. With some assistance from a very good friend and the labors of my husband, this unused part of our house will be getting a lot of attention this fall and winter.

To give you an idea of what we are working with here are some before pictures. It's a small space (about 9'4" square once it is done), but we hope to make as much of it as we can.

  I'm standing next to the slider that comes out from the kitchen and looking towards the deck. That door is teeny, tiny. Like 28" or something ridiculous and it bangs loudly when it shuts, which it doesn't actually do. It just bangs and bounces a couple times.
 
 You can see a glimpse of our new windows sitting inside the screened porch.


 The current ceiling fixture...yeah.


Here are the plans as we have them laid out now:
  • Tear out the existing screening, door, and framing
  • Remove the ratty, green, plastic carpet
  • Remove the siding that is inside the screened porch
  • Frame out the new walls with 2x6 wood so we can pack in more insulation (plus the corner beam is a 6x6 so we thought it would be better to have the wall depth match and cover the beam)
  • Install HUGE new windows (which will have a nice deep sill on the inside thanks to the 2x6 framing) and a new glass door that is bigger than the teeny tiny one we have now
  • Install siding on the outside that matches our current siding (Although, we have discussed changing out all the siding for something with more interest. We're tired of beige and white houses. That is further in the future though.)
  • Tear-out of the old plywood inside the room
  • Run new outlets and wiring for the room since it was a screened porch and currently has one outdoor outlet
  • Move the exterior light next to the slider outside to the deck
  • Reinsulate the walls and ceiling
  • Drywall
  • Paint
  • Install electric underfloor heating
  • Find some kind of flooring that we can agree with (husband wants tile, I want cork)
  • Install a ceiling fan to keep the room cool during the warm months since there isn't any HVAC ducting to it
  • Figure out some kind of table and seating arrangement (banquette, benches, round table with chairs, etc.)
  • Decorate
Wow, seeing it all written out makes this seem like a much larger project than I anticipated. I did detail some of the changes more than others and many of the single bullets could take many, many, many days of work, like framing and installing all the windows and doors. Plus, we have a lot of decisions to make further down the road. We've already hammered out the details on window and door placement so we're good there. It's the finishes that will most likely take more time at this point. I want to pick something that will flow with the rest of the house, but also be easy to match up for when we eventually remodel our kitchen. Wish us luck and hopefully the subject quote isn't too true with this project.